Create Multiple Page


Steps
-
Go to .

➊
➋
-
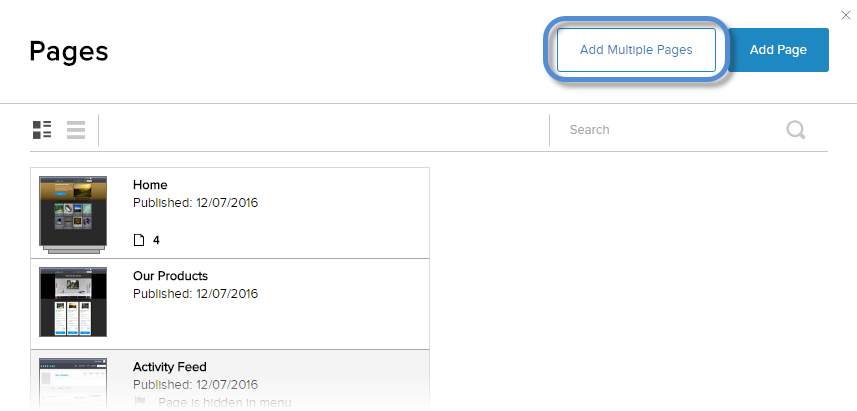
Click/Tap Add Multiple Pages.
-
Configure the settings that are common among the new pages.

Field Description Parent Page
Branch Parent
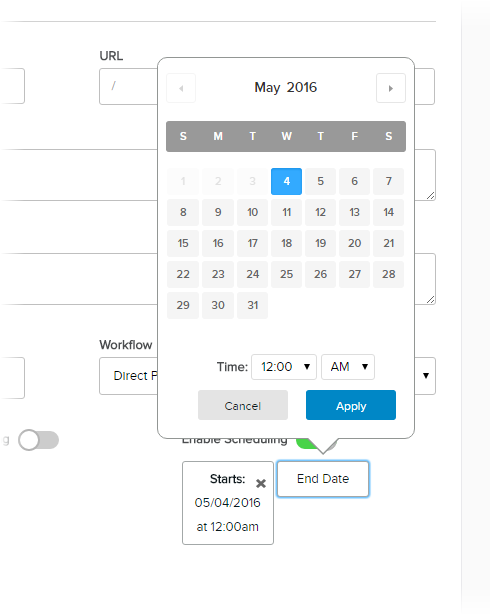
The page under which the new page(s) should reside in the hierarchy. Keywords Comma-separated keywords that can be used by search engines to help index your site's pages. Tags Predefined tags that you can choose from the dropdown, if any are defined in the Taxonomy Manager. Workflow Predefined workflow states that you can choose from the dropdown. Display in Menu If enabled, the page is included in the main navigation menu. If the page is not included in the navigation menu, you can still link to it using its URL. Link Tracking If enabled, tracking links are created to determine where traffic to the page is coming from. Enable Scheduling If enabled, the Start Date and End Date buttons appear below the switch. Click/Tap on either button to set the time span when the page is publicly visible on the site.
- The page is published after the specified start date. If Start Date is not set, the page is published immediately.
- The page is hidden after the specified end date. If End Date is not set, the page is visible indefinitely.
Bulk Pages to Add The names of the pages to add for use in the navigation. One per line. To create a hierarchy, prepend the name with >. Example:Topic 1 >Topic 1.1 >Topic 1.2 >>Topic 1.2.1 Topic 2
What to do next
Configure each page individually, according to page type.